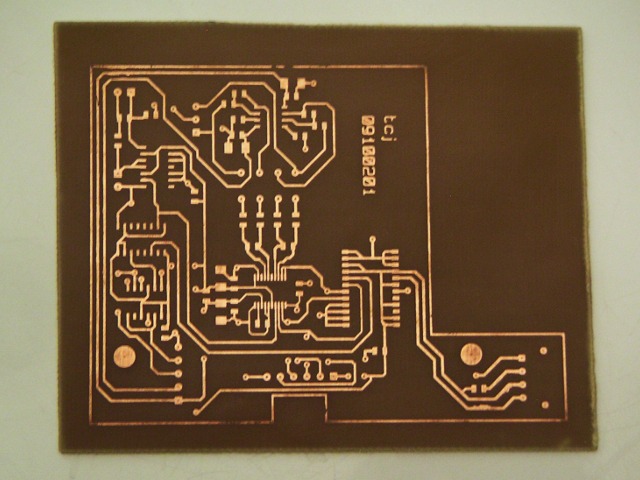
Producing moderately complex single and double sided etched circuit boards
at home using the toner transfer method is not too hard if patience and
a consistent method are used. I've evolved a check list that
works for me, with the equipment and materials I have, but as a lot of
it was developed and modified from the methods of other people, it may
need to be developed and modified for each individual's use. A lot
probably depends on the laser printer used. The one I have now is
a Brother HL-2070N, and I think that Brother printers are not
considered the best for toner transfer. All the same, I've got it
to work fairly well.
The checklist:
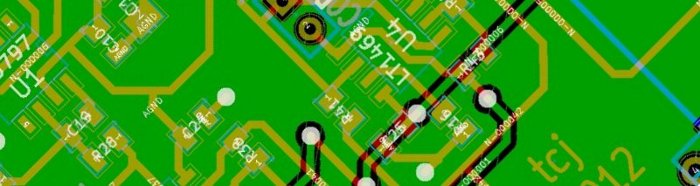
1. Design the artwork using your favorite pcb layout
software.
I use KiCAD, which I started using because it was available for Linux,
was free, and looked better and more stable than the other stuff out
there. It has evolved into a very capable program, able to handle
16 copper layers and a large collection of technical layers. I
never use more than three layers - top, bottom, and one for jumpers,
and I try to get away with one all-purpose signal layer (top), a bottom
layer groundplane with no traces on it, plus one jumper layer. If
I use the solid bottom layer groundplane, I drill a via for each
component lead that connects to ground. When etching, I just
cover the bottom copper with plastic tape to protect it from
the etchant. If I use both top and bottom layers as signal
layers, I will try to spread groundplane over most of the board,
especially on the bottom, if only to minimize the need for etchant.
2. Plot the top layer to a postscript file at 1:1, 600 dpi
resolution, mirror-imaged, printing only the copper. (If there's
a bottom layer, this does not get mirror-imaged.)
3. Import into an image manipulation program. I use
GIMP. Here you can fit it onto convenient paper dimensions,
center it as needed, and clean up anything that needs cleaning
up. I usually remove all of the board outline except for corners,
in case traces adjacent to the outline want to bleed over onto it.
4. There's a lot of discussion on the web about what paper to
use. There seems to be agreement that the stuff purpose-made for
toner transfer doesn't work any better than other options. What
is needed is something with a slippery enough surface that it will
allow the toner to transfer to copper with heat and pressure, without
bringing a lot of extra stuff with it. A lot of people recommend
various of the photo papers, but I find that their clay coatings
transfer with the toner and refuse to wash off before etching. I have
used the slippery backing paper used to hold sheets of adhesive labels,
but got so-so results. I have now settled on pages torn from the
New Yorker (Time or something similar would probably work as well).
[Update Jan '13 - I've now found the ideal paper. I sometimes get
an envelope full of coupons in the mail - it's marked 'Valpak' - and
the coupons inside are printed on paper that works really well.
It's thin, and its clay coating leaves no residue on the copper.
Also, after an hour's soaking, the paper crumbles right off.] It
doesn't matter if there's
printing on them; the ink doesn't transfer. Print the artwork on
this paper. It will be a mirror image (for the top side).
5. Cut some (double sided) copper-clad to a size a little larger
than the artwork. At least a tenth of an inch margin all around is
good, more may be better. I've found that toner sometimes doesn't
transfer well near the edge of the board, so it's a mistake to cut the
board to size before etching. Bevel the edges of the board (four
edges on both sides) with a file. This will encourage better
contact with the iron.
6. Scrub the blank board with steel wool, then clean it off with
alcohol on a piece of paper towel. I use 91% isopropanol, because
it's cheap and easy to get at pharmacies. From now on, avoid
touching the board surface, as skin oils may affect toner
adhesion. Now you should expose the surface about to be etched to
the etchant (ferric chloride - I use the stuff Radio Shack sells, but
so far as I know, all the ferric chloride etchants are the same).
Rub some on with a paper towel or a piece of sponge, trying for a
uniform dull brown color. This should take about 30 seconds, and
seems to provide a better grip for the toner than the bare copper
surface would. Then rinse with water, and clean again with
alcohol.
7. Preheat an iron to linen temperature - this is most of the way
up on the dial on most irons. It would be better to use an iron
with no steam holes in the sole plate, but in fact mine has them.
It would be even better to devise something that would provide uniform,
controllable pressure and uniform heat, maybe made from something like
an electric pressure grill, but I haven't gone that far yet.
8. Cut out the artwork and place it face down and centered on the
board. Pressing the iron briefly on the paper will adhere it to
the board. Then use a uniform back-and-forth motion with the
iron, with moderate pressure, to iron the paper onto the board.
Keep this up for 90 seconds, rotating the board regularly to get even
coverage.
9. Now put something cylindrical under the board, a rolling pin
or a wine bottle, for instance, and continue ironing for 60 seconds, putting the
iron on the board and rolling both of them on the cylinder. This
encourages uniform pressure over all parts of the board.
10. Drop the board into a bowl of soapy water. I've
experimented with fabric softener, which is supposed to be good for
removing wallpaper, but it doesn't seem to work better than soap for
this. Wait at least an hour so that the paper softens. Now
you can start scrubbing (with moderate pressure) with an abrasive
sponge like a Scotchbrite sponge. You may also want to rub bits
of paper off with your thumbs. At this point, a toothbrush might
be useful, but I've never tried one. The toner is surprisingly
tenacious, so you can get away with a fair amount of scrubbing. Avoid
peeling the paper off, as some toner will come with it.
Eventually, all the paper will be gone - check carefully at this point
(possibly with a loupe) to make sure that nothing is left clinging
between parallel traces. You can now tell if you've ironed too
little or too much; in the one case, the toner will have flaked off in
spots; in the other, you'll see that it will have melted.
11. Etch the board by dropping it into a pan of ferric chloride
solution. It is important to constantly remove the dark layer
that builds up on the surface of the board while etching. This
can be done with a fancy setup involving an aquarium pump moving
etchant around, or by constantly agitating the pan. I get very
fast results by just using a small foam paint brush (or a chunk of
sponge on a wooden stick) to constantly brush back and forth over the
surface of the board. This saves a lot of time and I think
produces a cleaner etch.
12. When the board is etched, rinse it carefully and completely
in water, and then put a coating of floor wax on it to passivate
it. I used to use Tin-It, which is a self-plating tinning
product, but it's touchy to use, and the floorwax works very nicely,
burning off when you apply a soldering iron. It's not good to put
the used etchant down the drain, but you can dump some baking soda in
it to precipitate the copper (as copper carbonate), which leaves a salt
solution that you can filter through a paper towel, then put down the
drain. It's now easier to safely dispose of the solid material trapped by the paper towel.
13. To do a double sided board, first iron the top side artwork
onto one side of the board, then drill a couple of holes in the board
(either at artwork targets or at artwork through-holes on diagonally
opposite sides of the board). You can then turn the board over, and
using something like short pieces of wire in the holes, line up the
bottom side artwork for ironing.
14. Cut the board to its final size. Drill as needed.
I use a Dremel tool mounted on a Dremel drill press stand for this.